In this tutorial, you’ll learn to properly plan and design a website using Adobe Illustrator. After that, we’ll convert your Illustrator layout into HTML and CSS.
PREPARATION: Site Map Creation and Content Gathering
Your website shouldn’t be complicated and tedious for users, and it won’t be if you take the time to plan it out before you build it. One of the most common mistakes made in the website design process, is jumping straight into the creation of the aesthetic component of your site. This may seem like a fun thing to do at first … but skipping the planning stage will probably lead to roadblocks later on in web design process.
… Remember that fixing a mistake takes longer than planning ahead and avoiding one altogether.
Here are some important planning steps:
List the content and features that you want to include in your site. You may not know all of that right away, and of course, you should allow for some flexibility as your ideas grow and change. But, try to include as much as you know now. For example, lets say your site will be about a new business. Your plan can include things like:
– Services offered.
– Testimonials.
– Prices.
– Contact Information.
You should make a sitemap.
Just like when you plan a road trip and create a route, you should create a navigation map for your site. You can easily do this in flow chart form. That way, you can create and visually see the links between your main pages and subpages.
Gather your content and text.
Your content should not be determined by a pre-established site design; rather, your design should be flexible enough to accommodate different lengths of content. Content can include photos, videos, website copy, etc. A good way to organize these files is by creating one folder on your computer and keeping all of your content in there.
Using a grid to plan your website’s layout.
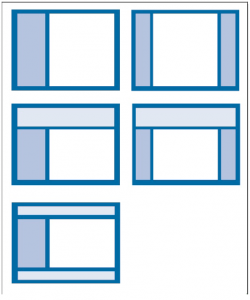
You have a choice of layouts and there will be advantages and disadvantages depending on your content. Like I mentioned before, it’s important to choose a layout that can handle all the different forms of content you’ll want to include in your site.
Now that you have an idea of your content from your planning list, you can make a decision on what grid to select. When selecting a grid, it’s important to choose one that provides the best flow of information of your content to the audience.
In the image on the right, you’ll find some basic and common grid layouts you can use. These are just basic structures that you will further customize down the road. Your choice of grid will be affected by the amount and type of content that you’ll have on your site. One thing you’ll modify, for example, is the location and font for the menu. If you have too many items or the item names are too lengthy, reducing the font size may not always be the best solution.
You have to remember that there are many kinds of people that browse the Internet and you want your site to be friendly to everyone’s eyes, old or young. You should use your common sense when it comes to menus. In the case of a long menu with many items, you may want to use a vertical layout but a shorter menu can be placed horizontally.
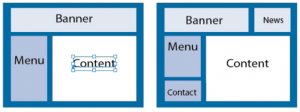
Lets work on the 3rd layout of the batch and try to figure out where we would put our items. In the images above, you’ll see that I have chosen to have a banner, my menu to the left, and my content on the right. These layouts are just a basic skeleton, like I said, and you can further customize them to fit your needs. For example, maybe you’d like a dedicated area for contact info instead of leaving as a menu item. This will keep it visible at all times and make it easy to locate.
MOCKUP: This is where we start the design process with the help of Adobe Illustrator.
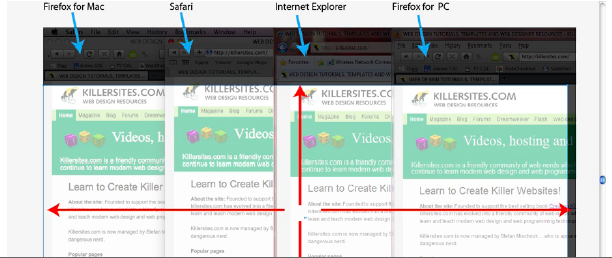
We have to decide what the size of our working document will be. I did all of the work for you here but I’m still going to explain how I got there and why. When trying to figure out what document size to use, I looked up the stats for the most common screen resolution: 1280p x 800p. But, that doesn’t give us the size we should use for our document – we still need to subtract things that take up screen real estate like menu bars, toolbars, tabs, scroll bars, etc. That gives us a “safe area” of about 1200p x 625p.
All right, now is the creative part. Open Adobe Illustrator. On the welcome screen select “New Web Document”.
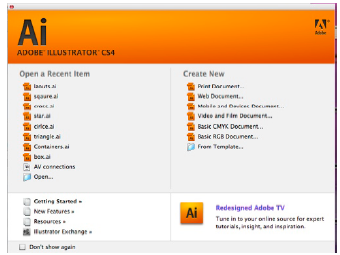
The “New Document” dialog box will appear and we are going to make some adjustments to the current settings. Select a size of 1200p x 625p and make sure the units are in “pixels”.

Now we have our new document and so I’m going to jump to the actual design process. For now, we’ll concentrate on translating a layout in HTML code and leave the funky Web 2.0 designs and graphics for other tutorials. So, I had chosen Layout Number 3 for my example. The layout has a banner, vertical menu and the content is to the right. Go to the “View” menu and make sure “Smart Guides” is checked.
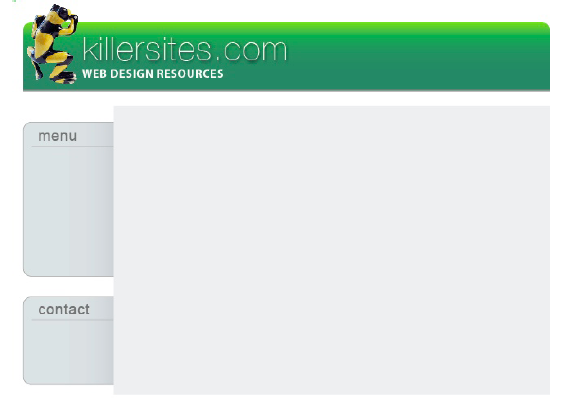
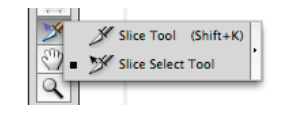
Now grab the “slice tool” from the tool bar or press “Shift + K” and drag a rectangle shape around the banner area. Having “smart guides” enabled will help you be very accurate with the shape. Don’t worry if is not perfect right away because we’ll fine-tune it later.
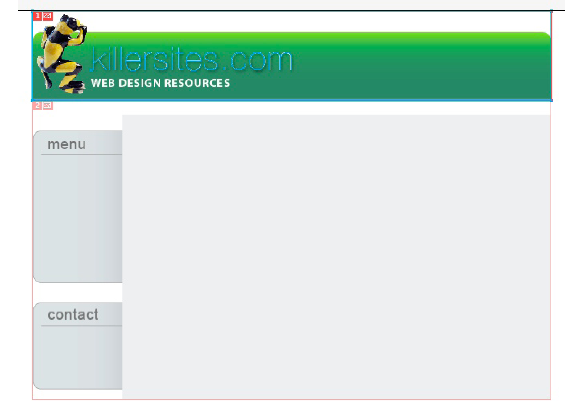
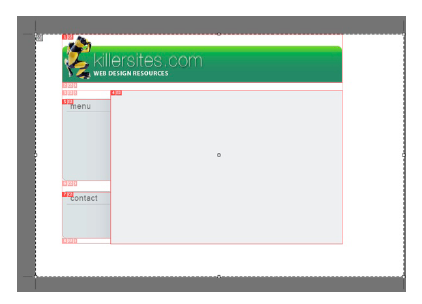
As you can see in the screenshot, we have divided the design into two areas or slices. Even though we only did that once Illustrator will complete the rest of the slices for us.
To finish making slices:
1. Draw one over the content (gray) area.
2. Draw one over the menu box.
3. Draw one over the contact box.
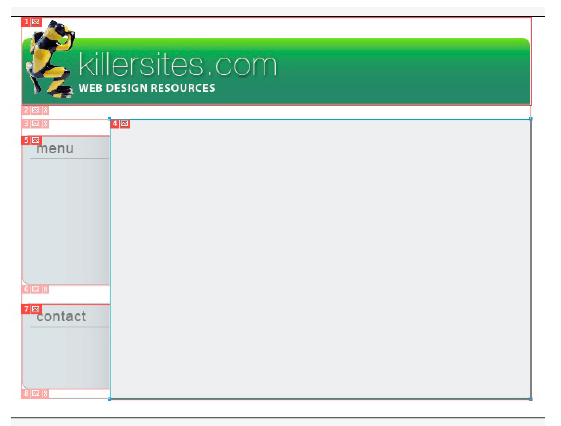
As you can see even though I only drew a total of four slices Illustrator created eight to fill in empty spaces. To make adjustments to your slices and get very accurate results, use the “slice selection tool” until you get them just right.
TRANSLATION: Refining Your Code for the HTML Template
For this next step we have to reduce our work areas to exactly the dimensions of our design.
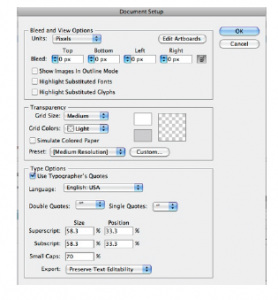
1. Go to the “File” menu.
2. Click on “Document Setup”.
3. When the document setup window opens click on “Edit Artboards”.
4. Move the nodes until the gray area completely surrounds your work, and then press the escape key.
Now we are going to export what we’ve created to HTML:
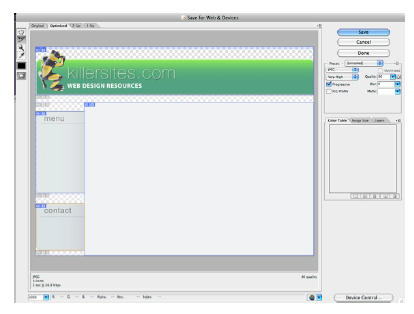
1. Go to the “File” menu
2. Click on “Save for Web and Devices”
3. Under the preset section select JPG and “Very High Quality”.
4. Click on “Save”.
5. In the “Save” dialog box settings select:
6. Format to HTML and Images.
7. Settings should be set to Default.
8. Slices should be set to “All Slices”.
9. Select your destination folder.
10. Click “Save” again
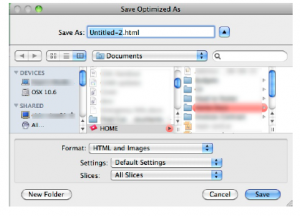
What Illustrator will do is create an HTML document with a table with cells of the exact dimensions of your slices and containing the images of your design. The images are saved in a new folder called “Images” in the same directory that contains your Illustrator file. For those of you experienced with HTML, you know by now that tables must be translated to <div> tags. To do that we don’t need the generated HTML because the images created for the slices give us the dimension to specify properties for our divs in the CSS. If you are an HTML newbie, the HTML exporter from Illustrator is a great time saver.
Now there are just a few more changes to make before you can start putting the rest of the content in your html page.
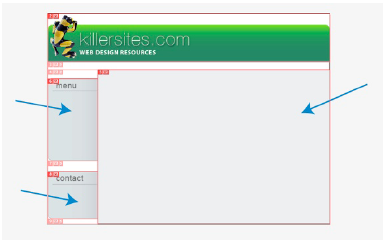 You need to make sure that when we remove the image from the cell, that the cell will stay the same size. To do so, copy the image location and dimensions somewhere because we are going to use these as attributes for the table cell.
Images/Untitled-2_06.gif width=”139″ height=”232″
The code of the table cell will turn into this:
<td” width=”139″ height=”232″ align=”left” valign=”top” background=”images/Untitled-2_06.gif”></td>
Do that for the rest of the cells marked and then you’ll be able to write your content in between the tags.
PHOTOSHOP
If you feel more comfortable working with Adobe Photoshop instead than Illustrator, than you are in luck. The workflow to export to HTML is exactly the same, except for the artboard size change. In Photoshop you just need to use the “crop” tool and then export by going to the “File” menu and selecting “Save for Web and Devices” using the same directions that were explained for Illustrator.
CONCLUSION
This technique is very simple and will save you lots of time. Adobe Illustrator is a great tool for layout and design. I find it easier and more versatile than Photoshop and I would advise that after completing this tutorial and getting more familiar with HTML and CSS, you try and eliminate the use of tables for a more elegant solution using <div> tags and CSS. I’ll hopefully cover this in an upcoming tutorial.
8 responses to “From Header To Footer: Designing a Layout with Adobe Illustrator”
Thank you Napo,
I am a beginner in Web design, I think this is very useful for me.
Thank you.
Thank you very much – you explained everything so nicely I finally understand! I look forward to your upcoming tutorial about replacing the tables with tags.
Thank you Napo,
I am a beginner in web design,I think this is powerfull starting for me ,I look forward to your upcoming tutorial about replacing the tables with tags.
It is refreshing to see an Illustrator/Photoshop web design tutorial that actually shows how to get the design sliced and into html. Too many of these tuts stop after they show you how to make a gradient. I can’t wait until Ill/Photoshop will be able to generate an html page with divs and css.
Thank you very much! This is very helpful! 🙂
I am a beginner and I’m looking forward to more of your tips!
This is wonderful. I’d wondered if AI could be utilized more fully in designing a web site.
I couldn’t be a newer “newbie.” Does this tutorial assume the student is working with tables rather than CSS? Can this document be used with Dreamweaver?
Thanks,
Sharon
Hi,
“Does this tutorial assume the student is working with tables rather than CSS?”
Not at all. It is assumed that you will use modern CSS based techniques.
“Can this document be used with Dreamweaver?”
Easily … and any other web design software. I recommend highly you do out basic course on web design: http://www.killersites.com/web-design/
This was good.