In Getting Started with iPhone and iPad Development I introduced some of the key concepts involved with developing content for the iPhone OS platform on 300 dollar loan same day. To recap, Apple produces several devices that run the iPhone OS including:
- iPod Touch
- Casoola Casino Ceske iPhone
- iPad
All of these devices allow users to both browse the web and run standalone applications, in addition to their other functions (like listening to music, making phone calls, or reading ebooks). While iPhone OS devices can load and display the same web sites as your desktop/laptop computer, it makes sense to design content specifically for these devices.
This article looks at Apple’s Dashcode tool, which allows you to quickly produce web content that is optimized for both online slot spiele the Mobile Safari web browser and its big sister, the desktop version of Safari. Sites developed with Dashcode leverage Safari’s support for the new HTML5 standards and allow web content developers to deliver a user experience only previously possible by relying on plugin technologies like Adobe Flash/Flex.
Starting a Project
When you start Dashcode you are presented with a project creation screen where you can select from a number of templates.
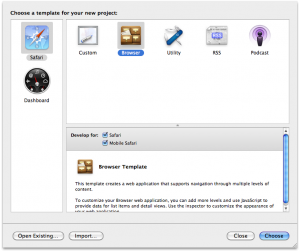
The first thing to note is that Dashcode can be used to create content for the Web as well as Mac OS X Dashboard widgets, but we’ll focus on the former today. Having gotten that out of the way we can choose a template to use and in this case we’ll choose the Browser template and further specify that we want to support both Safari and Mobile Safari by selecting both check boxes.
After hitting choose, Dashcode creates your project and you’ll see something like the following screen:
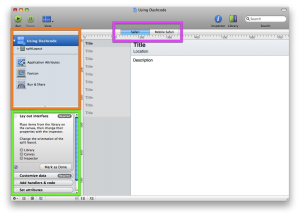
I’ve highlighted a few area for further discussion. Let’s start with the area in purple that lets you choose between the Safari and Mobile Safari views. In the view above we’re seeing the view of the application that users would see using their desktop or laptop computer browser (as opposed to their iPhone).
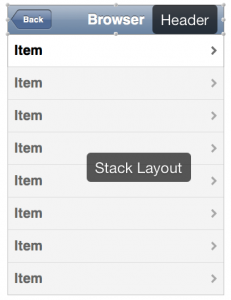
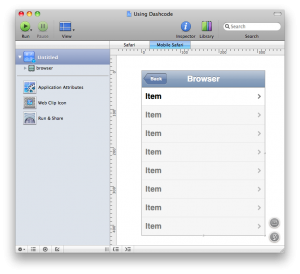
Conversely in the illustration below, we see the Mobile Safari version of the same screen.
I’ll refer to this style of Web Application as a multi-client application, meaning that the applications supports different ways of presenting information to users depending on the device they are using. While there will be a certain amount of overlap (which we definitely want to leverage) we need to cater for the limits of the iPhone’s smaller screen size as compared to a laptop/desktop display.
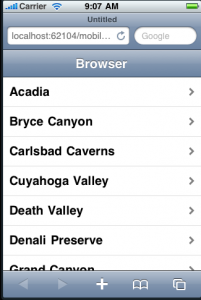
The sample application generated by the template presents users with a list of locations that they can select and then see the details.
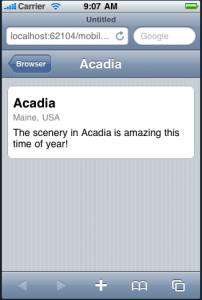
The mobile version uses two views to present information, shown here.
The first view is a list of locations; selecting one of the locations loads the second view which provides more detail.
If we look at the non-mobile version of the same web application we see a single screen divided into two areas. The area to the left provides the list; selecting a specific item loads the details into the right-hand side of the screen.
You’ll note that both the mobile and non-mobile versions of the application provide access to the same data and indeed, the same functionality. But the non-mobile version accommodates the smaller screen size of the iPhone and presents the information in a way that is best suited to that device.
On the other hand, users with bigger screens need not be constrained to an interface designed for a phone. The application created by the Dashcode template allows you to support both devices in a single application code base. One of the main ways it is able to do this is by using a model-view-controller design strategy. In concrete terms, all of the views (mobile or desktop) use controls that work with datasources. This is a powerful feature of Dashcode that helps promote good applications design; the payoff is the capability to support multiple client profiles in a codebase that is more easily maintained over time.
Having looked at the sample application created by Dashcode, let’s turn to the Dashcode panes as a way of developing a better understanding of how to work with the tool.
Dashcode Panes
Outline
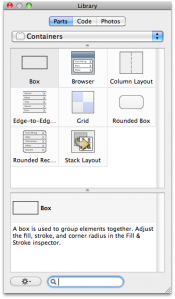
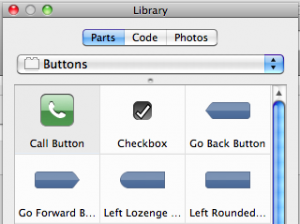
At the top left of the Dashcode window we can see a structural outline of the application. Dashcode provides access to a number of parts that you can drag and drop from the Dashcode Library to build your web application. Dashcode parts fall into a number of categories that include:
- Buttons
- Containers
- Indicators
- Media
- Text
- Shapes
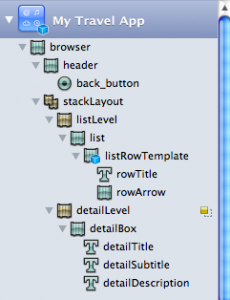
The project created by the Browser template uses a number of containers to organize the application’s content. At the top level is the browser container which is meant to hold two children: a header and a stackLayout.
The header provides a navigation bar that includes a back button and a title to show the user where they currently are as they navigate from screen to screen.
The stackLayout supports adding multiple views that can be swapped out as needed. You can think of a view as a child-container that you can add Dashcode parts to (e.g. buttons, text).
This application includes two views (listLevel and detailLevel) which correspond to our two screens. The listLevel shows users the list of locations: clicking one of these loads the screen that shows the detail. If you are familiar with the iPhone Cocoa Touch APIs you may recognize a close analogue here to that API’s NavigationController class.
Configuration and Deployment
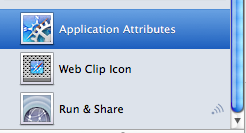
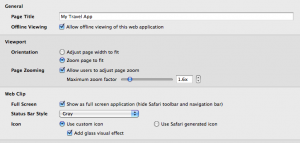
The next pane I’ve labelled Configuration and Deployment lacking any better term to describe it. Clicking on any of these items will bring up an editor in Dashcode’s right pane that you can use to do certain things.
The screen shown here allows editing of a number of your applications general attributes including the title and how your application is laid out. Of particular interest is that you can mark your application for offline viewing. This will allow the iPhone to download the screens and data so that users can interact with your app even when disconnected from the internet.
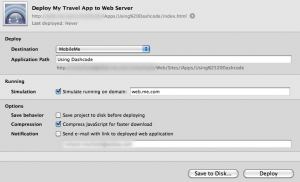
The Run and Share button brings up a screen that allows you to deploy your application to a number of locations that include your local hard disk, an FTP server or a MobileMe account.
The Web Clip Icon button allows you to design an icon that will be associated with your web application.
Workflow Steps
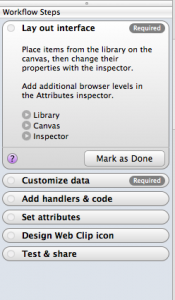
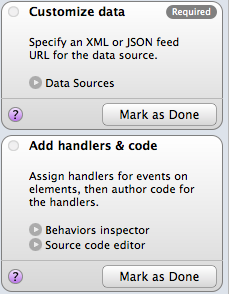
Dashcode features a workflow tool (of a sort) designed to guide the user in developing their site. As seen in this screenshot, the workflow is broken down into a number of steps as follows:
- Lay out interface
- Customize data
- Add handlers & code
- Set attributes
- Design Web Clip icon
- Test & share
Each step has a corresponding expandable section that describes the workflow step and provides links to relevant Dashcode tools like the Library, Canvas, etc… 
I expect that experienced users will tend to ignore the tool. But for someone new to developing iPhone web apps with Dashcode, it can be a useful guide for getting started.
Files
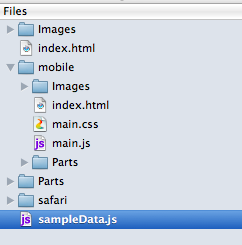
Of course what you are actually working with when using Dashcode are files. Naturally enough these include:
- HTML
- Javascript
- Cascading Style Sheets
- Images (e.g. PNG files)
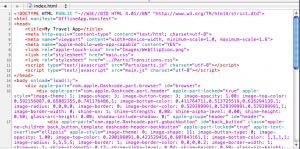
You can edit these directly using the editor Dashcode provides. The editor provides the usual features such as syntax highlighting and code completion. There is an issue if you want to edit these files with another editor: your files are stored in a Mac OS X Package and that makes using external tools in conjunction with Dashcode tricky. There’s probably a way to do it but it may require jumping through some hoops.
While Dashcode does provide tools that ‘wrap’ the files, you will probably need to edit those files yourself at some point to add some customization. For instance you’ll want to write some Javascript to handle events like clicking on a button. While Dashcode will generate stub implementations of these at the click of a button, you will need to finish them off. Luckily the Dashcode Library contains a tab with code snippets that you can customize as needed.
Conclusion
Dashcode provides web application developers with an easy-to-use tool that can be used to develop sites specifically designed for both the mobile and standard versions of Safari. Users of this tool will almost certainly be mainly (if not exclusively) interested in using it to build their iPhone and iPad compatible sites.
It should be remembered though that Apple’s commitment to open web standards is actually pretty good. With some care (and lots of testing) there is no reason you cannot develop sites that work across a range of devices.
In a future article, I’ll dig deeper into the tools provided by Dashcode with particular emphasis on Dashcode parts and how they can be used to build sites with a rich user interface.
]]> The introduction of the iPhone by Apple a few years back caused a lot of excitement among both consumers and developers.The iPhone was arguably the first mobile device that made both mobile computing and web surfing practical.The iPad (which runs on iPhone OS) has been met with skepticism in some quarters.But so far it appears to be selling well and attracting a lot of interest from content creators.Apple originally intended that the main source of third-party applications for the iPhone would be web applications, and there are of course many of these.But something funny happened casin kutna hora when Apple released the iPhone SDK and an App Store to go with it – people came.Developers developed and consumers consumed.In this article I’ll be looking introducing iPhone-OS content development and give a high-level view of what is involved.Hopefully this will be enough to allow you to figure out if and where you need to go next.
Three styles of development
Traditional Web ContentWhile it is tempting to differentiate between application and web-application development, it is important to remember that the iPhone can be used to browse many (if not most) web sites.The iPhone touch-screen interface, with its support for gestures (e.g.pinch the screen to zoom), makes surfing on the iPhone a relatively decent experience.So you can just develop your web site as you might normally do and chances are, iPhone users will be able to use it.
iPhone Web Content
But of course the iPhone screen is considerably smaller than laptop or desktop screens.If you want to serve up web content to iPhone users, it makes a sense for a site to cater specifically to the device’s small screen size.In addition though, the iPhone’s browser – Mobile Safari – has some great features that can be leveraged to make a really compelling web experience.And Apple have made it easy by providing web developers with a tool – Dashcode – that can used to produce those web apps.
iPhone Applications
When Apple released the iPhone and developers got a chance to play with the applications shipped by Apple, a great cry was heard throughout the land.Alas, the cry largely came from developers who wanted a chance to write their own applications for the device.While Apple was initially reluctant, they eventually got with the program and sometime later released the iPhone SDK and it’s companion, the App Store.Apple’s success here was two-fold and worth noting:
- The tool suite provided by Apple made it relatively easy for developers to create compelling applications for the platform.
- The App Store made it (relatively) easy for developers to distribute their applications to the public.
While stories are sometimes heard about the difficulties associated with getting apps onto the store, there is still no comparable platform among competing devices.It’s getting there, but to the best of my knowledge it ain’t there yet.
Web development
When to choose this option
This is probably a hard question to answer in some ways.If you already have existing web content, it may makes sense to re-package some (or all) of it for iPhone users.The same logic you would use to decide between a desktop verses a web application applies here: for instance if your application delivers data that changes very often, then a web application may make sense.One criteria that has often been key in making this choice, was the need for the application to work when the device is not connected to the network.This is less relevant though as the iPhone supports HTML5 offline mode.This means you can actually create web applications that store data on the device so that users can continue to use the application even when they are not connected.I’ll have more to say on this later when discussing full-blown application development later in this article.
Tools – who need tools?
Well you could always use Dreamweaver to create your iPhone web assets (or whichever HTML authoring tool you like).But Apple provides Dashcode which is designed to make creating iPhone web apps really easy.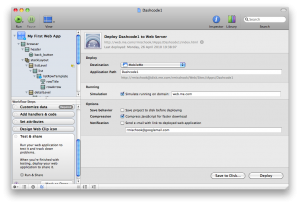 If you’ve ever done any Mac development, then Dashcode will look quite familiar as it is part of the XCode suite of development tools.You can download the suite from Apple’s development website at http://developer.apple.com.Look for the links to the IPhone Dev Center and then the iPhone SDK 3.x (currently 3.2).There are two caveats here:
- You’ll need to sign up for a developer account – but it’s free.
- You’ll need a Mac to run the tools – they will not run on Windows or Linux.
Some people find the latter requirement a little unfair, but there is one good technical reason for it (aside from any commercial considerations Apple may have).The iPhone OS is actually a slimmed-down version of Mac OS and the simulator tools provided by Apple leverage your Mac’s own operating system.I won’t be going into great detail here about how to use Dashcode, but I do want to point out some key details.The first is that – as you would expect – Dashcode provides some templates out of the box to get you started.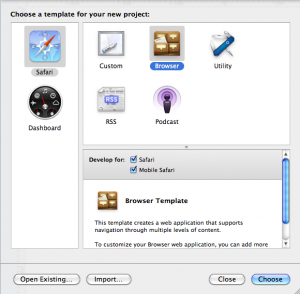 As shown here, Dashcode provides support for developing sites that are suitable for both Mobile Safari and Desktop Safari (the version that runs on Mac and Windows machines).Like Firefox (and unlike current versions of Internet Explorer) Safari supports HTML5.HTML5 promises to unleash a whole new world of cool web applications that contain features currently only achievable using plugins or other proprietary extensions.Another interesting feature of Apple’s development tools, is that they are designed to help you adopt Apple’s development practices.These include concepts you may or may not have been exposed to such as Object Oriented Development and a range of best-of-breed software design patterns like Model-View-Controller, among others.
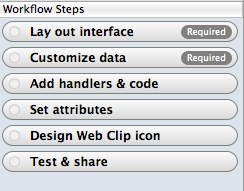 Dashcode is designed to promote good practice in web development, and one of the features is a workflow tool (shown here).If you follow the suggestions the tool provides, you should end up with sites that leverage technologies like AJAX and HTML5 to decouple your screens from your data.This in principle means you should be able to re-use your data URLs to feed other device screens such as a desktop or iPad browser, or a client written using another framework such as Adobe Flex.Note I have said ‘in principle’ – I have not actually tried it yet.Once installed, you can launch Dashcode from /Developer/Applications/Dashcode.I’ll leave the topic of iPhone web development behind now and turn to application development for iPhone OS.
Application Development
Reasons to choose this option
The iPhone, iPod Touch and iPad all run a slimmed-down version of Mac OS X, the same operating system that runs on Apple’s laptop and desktop computers.OS X is essentially a version of Unix which has been significantly enhanced with a range of extras that include the Cocoa libraries; these libraries are what give Mac’s their singular user interface.For iPhone OS, Apple created the Cocoa Touch API, which is in some sense a subset, but introduced multi-touch capabilities to the OS (i.e.
the ability to support touch screen gestures like ‘swipe’ and ‘pinch’ for example.The iPhone OS also supports a number of technologies for doing other things like:
- playing video
- animation using OpenGL technology
- accessing network resources (e.g. web, email)
- loading and saving data
If your application needs to do any of these things, then it is probably a good candidate for being developed and shipped as an App.Even if your application could be delivered as a web application, there may be good reasons to ‘App-ify’ it; for example Apps can be sold on the App Store (hey money is good).Apple also allows you to sell extra content for your app, so for example a game could allow users to buy extra levels.One caveat is that iPhone App development is done using the Objective-C language.Programmers with experience of another object-oriented language such as C++, Java or Smalltalk should have little problem picking up Objective-C.But if you don’t have that background, it will take awhile and perhaps be more of an investment than you are willing to make.
Tools for App development
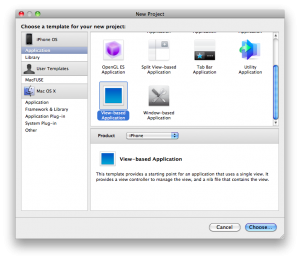
As mentioned earlier, the iPhone SDK contains tools for developing both web and standalone iPhone applications.Having installed the SDK, you can run XCode from /Developer/Applications/XCode to get started.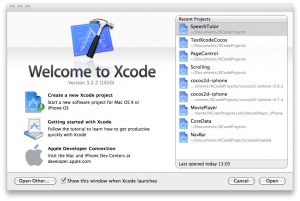 Like Dashcode, XCode provides a series of templates that you can use to get started.In fact there are open source projects out there that add new templates to XCode.
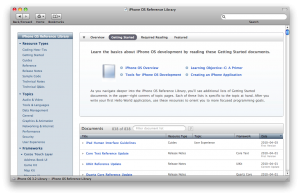
 One of the best features of the Apple SDKs is the incredible quality of the documentation, and the way it is integrated into XCode.You can use the document browser directly or link directly to relevant documentation as you are coding.
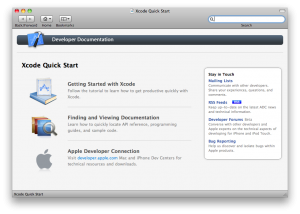 Hopefully the screen shots shown here give you some idea of the richness of the material provided.Aside from more formal API documentation, there are lots of zipped XCode projects that you can open up and run to see how they work, while examining and stepping into the code.
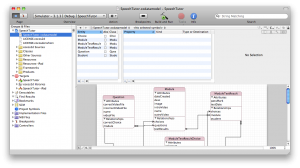
 The Integrated Development Environment (IDE) itself is pretty much what you would expect.It provides syntax highlighting, code completion and on the fly checking among other features.It also includes visual modeling tools like that shown above (which uses Apple’s Core Data API).
 Another great feature of XCode is the analysis tools provided.These break down into two categories:
- Static Analysis: static analysis looks at your source code and tries to find problems that could lead to memory leaks or crashes
- Dynamic Analysis: aside from a good debugger, XCode ships with a suite of tools called Instruments. These are used with the simulator (or your actual iPhone) to monitor your application why it is running.
The screenshot below shows the Leaks instrument which – not surprisingly given it’s name – looks for memory leaks.Other instruments include Activity Monitor, Object Allocations and CPU Monitor.Tools like these are vital when developing for a mobile platform where every byte of memory counts.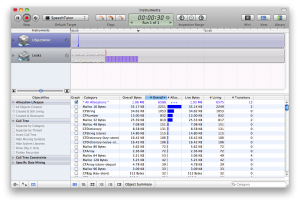 Earlier I mentioned that you could debug your code in either the simulator or – if you own one – an iPod Touch or iPhone.It’s important to understand though that deploying your code to a device will require you to join the paid developer program for US $99 per year.Doing so entitles you to:
- Access specialized resources on the Apple Developer site
- Deploy your Apps to devices for test and demo purposes
- Distribute your Apps on the Apple App Store
While some might object to having to pay Apple $99 per year, it can be argued that given the benefits listed above, it represents fair value for money.This argument takes on added weight when you consider how difficult it was, prior to the iPhone, to distribute applications on other mobile platforms.
Conclusion
Developing for the iPhone can be a lot of fun especially since you have a choice of web verses standalone development models to choose from.The tools and documentation provided by Apple are very good.In fact they make it relatively easy for someone with no prior experience of mobile development to build a working application quite quickly.The recent introduction and early success of the iPad promises fresh opportunities for developers to be creative and even – with some luck – make some money.And if you manage to tap that iPot of Gold – hey don’t be afraid to share the wealth ;-).
]]>
![Using Dashcode [Dashcode]](http://www.killersites.com/magazine/wp-content/uploads/2010/06/Using-Dashcode-Dashcode-300x275.png)
