Introduction
In Getting Started with iPhone and iPad Development I introduced some of the key concepts involved with developing content for the iPhone OS platform on 300 dollar loan same day. To recap, Apple produces several devices that run the iPhone OS including:
- iPod Touch
- Casoola Casino Ceske iPhone
- iPad
All of these devices allow users to both browse the web and run standalone applications, in addition to their other functions (like listening to music, making phone calls, or reading ebooks). While iPhone OS devices can load and display the same web sites as your desktop/laptop computer, it makes sense to design content specifically for these devices.
This article looks at Apple’s Dashcode tool, which allows you to quickly produce web content that is optimized for both online slot spiele the Mobile Safari web browser and its big sister, the desktop version of Safari. Sites developed with Dashcode leverage Safari’s support for the new HTML5 standards and allow web content developers to deliver a user experience only previously possible by relying on plugin technologies like Adobe Flash/Flex.
Starting a Project
When you start Dashcode you are presented with a project creation screen where you can select from a number of templates.
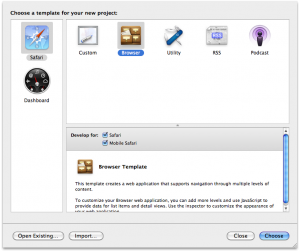
The first thing to note is that Dashcode can be used to create content for the Web as well as Mac OS X Dashboard widgets, but we’ll focus on the former today. Having gotten that out of the way we can choose a template to use and in this case we’ll choose the Browser template and further specify that we want to support both Safari and Mobile Safari by selecting both check boxes.
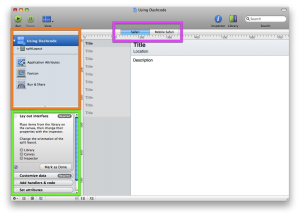
After hitting choose, Dashcode creates your project and you’ll see something like the following screen:
I’ve highlighted a few area for further discussion. Let’s start with the area in purple that lets you choose between the Safari and Mobile Safari views. In the view above we’re seeing the view of the application that users would see using their desktop or laptop computer browser (as opposed to their iPhone).
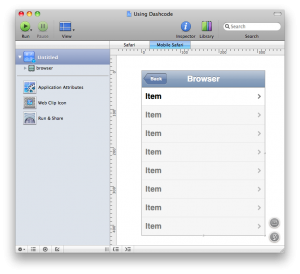
Conversely in the illustration below, we see the Mobile Safari version of the same screen.
I’ll refer to this style of Web Application as a multi-client application, meaning that the applications supports different ways of presenting information to users depending on the device they are using. While there will be a certain amount of overlap (which we definitely want to leverage) we need to cater for the limits of the iPhone’s smaller screen size as compared to a laptop/desktop display.
The sample application generated by the template presents users with a list of locations that they can select and then see the details.
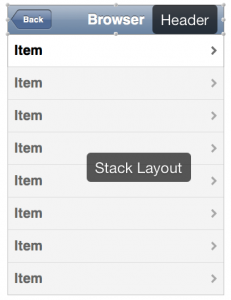
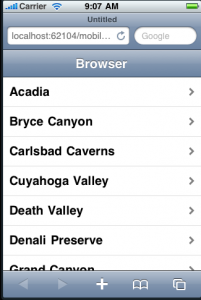
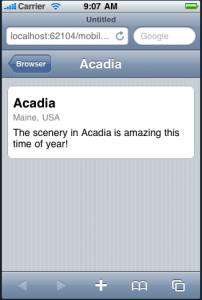
The mobile version uses two views to present information, shown here.
The first view is a list of locations; selecting one of the locations loads the second view which provides more detail.
If we look at the non-mobile version of the same web application we see a single screen divided into two areas. The area to the left provides the list; selecting a specific item loads the details into the right-hand side of the screen.
You’ll note that both the mobile and non-mobile versions of the application provide access to the same data and indeed, the same functionality. But the non-mobile version accommodates the smaller screen size of the iPhone and presents the information in a way that is best suited to that device.
On the other hand, users with bigger screens need not be constrained to an interface designed for a phone. The application created by the Dashcode template allows you to support both devices in a single application code base. One of the main ways it is able to do this is by using a model-view-controller design strategy. In concrete terms, all of the views (mobile or desktop) use controls that work with datasources. This is a powerful feature of Dashcode that helps promote good applications design; the payoff is the capability to support multiple client profiles in a codebase that is more easily maintained over time.
Having looked at the sample application created by Dashcode, let’s turn to the Dashcode panes as a way of developing a better understanding of how to work with the tool.
Dashcode Panes
Outline
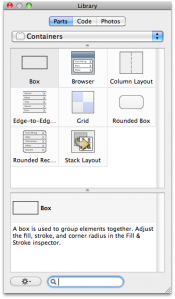
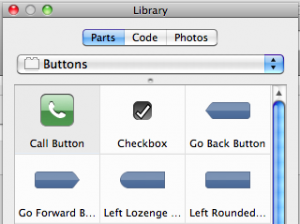
At the top left of the Dashcode window we can see a structural outline of the application. Dashcode provides access to a number of parts that you can drag and drop from the Dashcode Library to build your web application. Dashcode parts fall into a number of categories that include:
- Buttons
- Containers
- Indicators
- Media
- Text
- Shapes
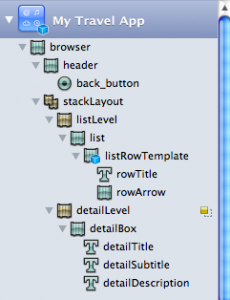
The project created by the Browser template uses a number of containers to organize the application’s content. At the top level is the browser container which is meant to hold two children: a header and a stackLayout.
The header provides a navigation bar that includes a back button and a title to show the user where they currently are as they navigate from screen to screen.
The stackLayout supports adding multiple views that can be swapped out as needed. You can think of a view as a child-container that you can add Dashcode parts to (e.g. buttons, text).
This application includes two views (listLevel and detailLevel) which correspond to our two screens. The listLevel shows users the list of locations: clicking one of these loads the screen that shows the detail. If you are familiar with the iPhone Cocoa Touch APIs you may recognize a close analogue here to that API’s NavigationController class.
Configuration and Deployment
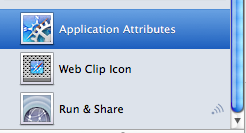
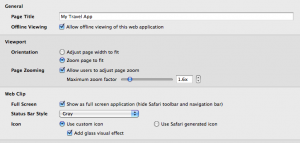
The next pane I’ve labelled Configuration and Deployment lacking any better term to describe it. Clicking on any of these items will bring up an editor in Dashcode’s right pane that you can use to do certain things.
The screen shown here allows editing of a number of your applications general attributes including the title and how your application is laid out. Of particular interest is that you can mark your application for offline viewing. This will allow the iPhone to download the screens and data so that users can interact with your app even when disconnected from the internet.
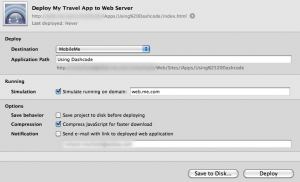
The Run and Share button brings up a screen that allows you to deploy your application to a number of locations that include your local hard disk, an FTP server or a MobileMe account.
The Web Clip Icon button allows you to design an icon that will be associated with your web application.
Workflow Steps
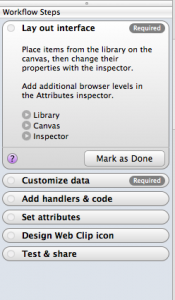
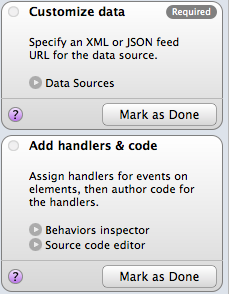
Dashcode features a workflow tool (of a sort) designed to guide the user in developing their site. As seen in this screenshot, the workflow is broken down into a number of steps as follows:
- Lay out interface
- Customize data
- Add handlers & code
- Set attributes
- Design Web Clip icon
- Test & share
Each step has a corresponding expandable section that describes the workflow step and provides links to relevant Dashcode tools like the Library, Canvas, etc… 
I expect that experienced users will tend to ignore the tool. But for someone new to developing iPhone web apps with Dashcode, it can be a useful guide for getting started.
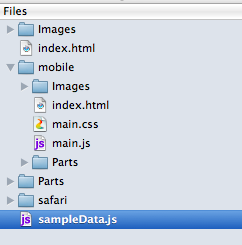
Files
Of course what you are actually working with when using Dashcode are files. Naturally enough these include:
- HTML
- Javascript
- Cascading Style Sheets
- Images (e.g. PNG files)
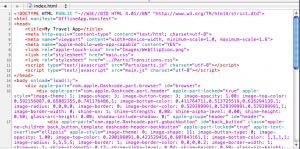
You can edit these directly using the editor Dashcode provides. The editor provides the usual features such as syntax highlighting and code completion. There is an issue if you want to edit these files with another editor: your files are stored in a Mac OS X Package and that makes using external tools in conjunction with Dashcode tricky. There’s probably a way to do it but it may require jumping through some hoops.
While Dashcode does provide tools that ‘wrap’ the files, you will probably need to edit those files yourself at some point to add some customization. For instance you’ll want to write some Javascript to handle events like clicking on a button. While Dashcode will generate stub implementations of these at the click of a button, you will need to finish them off. Luckily the Dashcode Library contains a tab with code snippets that you can customize as needed.
Conclusion
Dashcode provides web application developers with an easy-to-use tool that can be used to develop sites specifically designed for both the mobile and standard versions of Safari. Users of this tool will almost certainly be mainly (if not exclusively) interested in using it to build their iPhone and iPad compatible sites.
It should be remembered though that Apple’s commitment to open web standards is actually pretty good. With some care (and lots of testing) there is no reason you cannot develop sites that work across a range of devices.
In a future article, I’ll dig deeper into the tools provided by Dashcode with particular emphasis on Dashcode parts and how they can be used to build sites with a rich user interface.
![Using Dashcode [Dashcode]](http://www.killersites.com/magazine/wp-content/uploads/2010/06/Using-Dashcode-Dashcode-300x275.png)
